Every art begins with theory, then evolves through testing, refining techniques, and learning from mistakes and successes. Understanding aperture meaning in photography in one of the first steps in getting to know the camera, the main tool of every photographer. In this article, I’m going to break down a fundamental concept in photography – camera aperture.
So, what exactly is a camera aperture? Well, think of it as a important part of your camera lens that controls how much light enters the camera. It’s like the eye of the camera—it opens wider or closes smaller to adjust the amount of light hitting the camera sensor.
You’ll often see it referred to by the letter “F” in camera specs and descriptions.

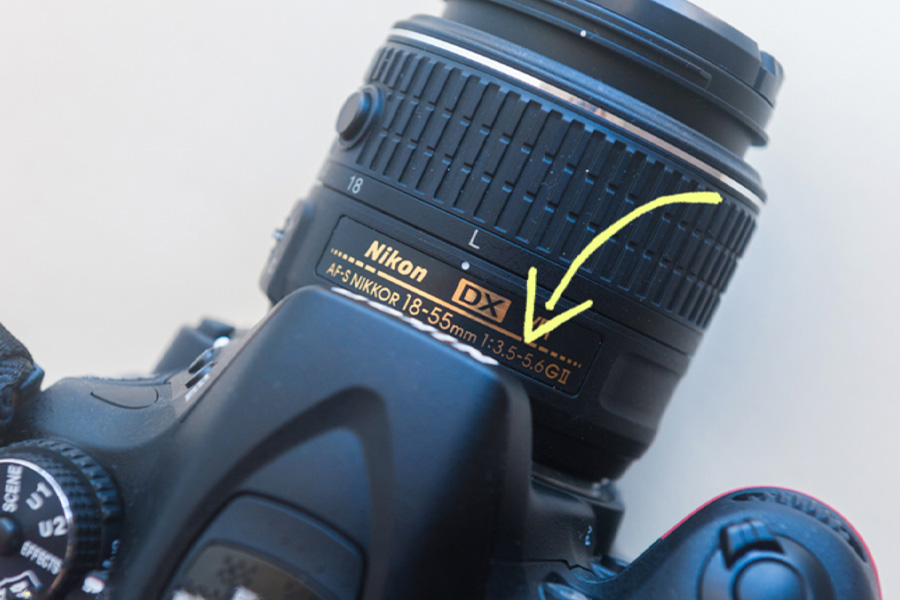
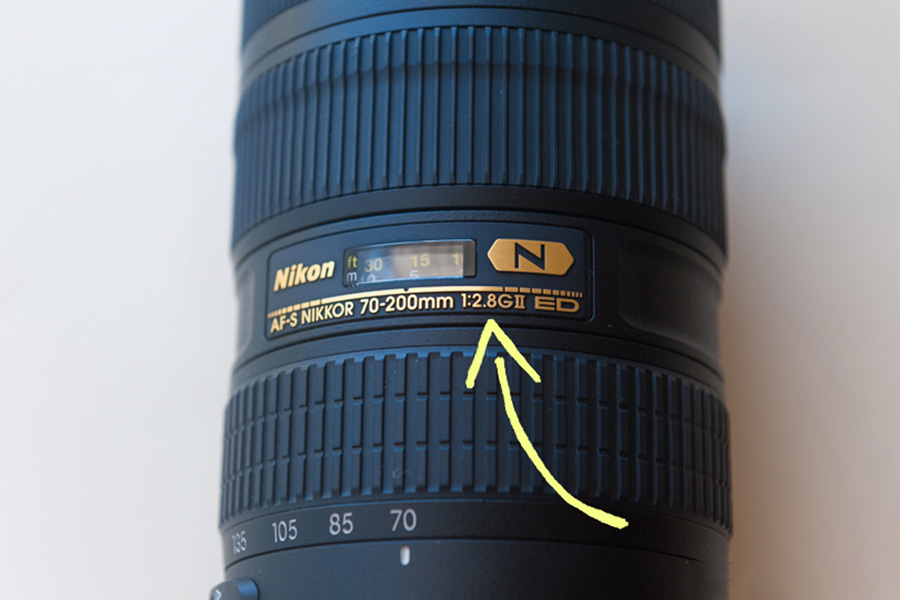
In simpler terms, the aperture is like the pupil in your eye—it adjusts to let in more or less light depending on the situation. Why does this matter? Because it’s crucial for getting the right exposure in your photos. By adjusting the camera aperture, you can make your images brighter or darker, depending on the lighting conditions and the look you’re aiming for.
Understanding aperture is one of the first steps to mastering photography—it’s the foundation for capturing those perfect shots.
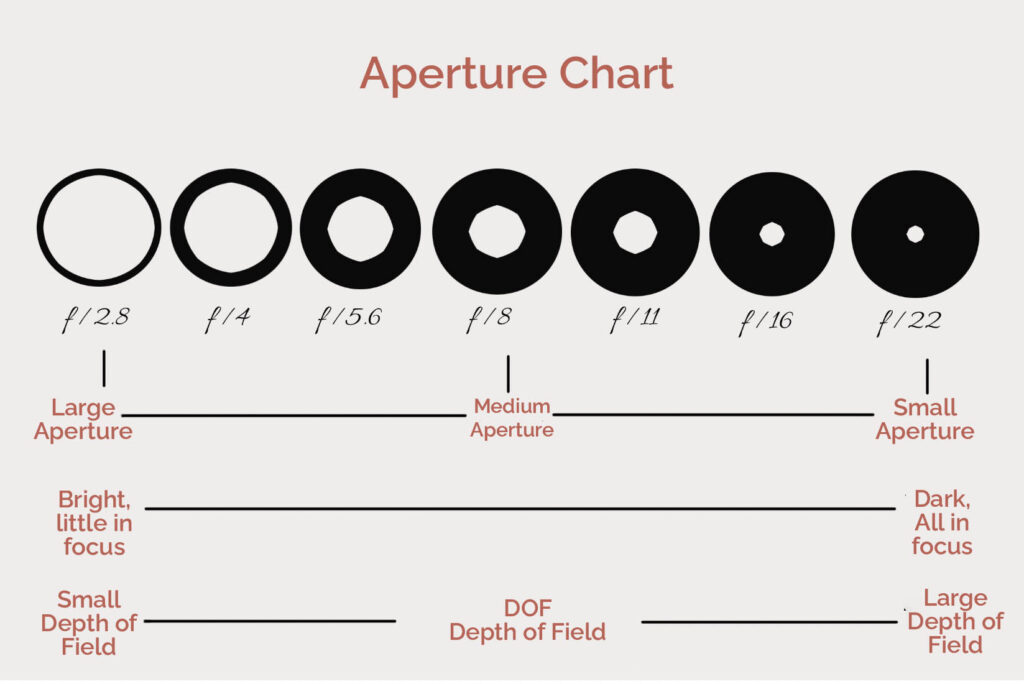
The key thing you need to understand about the aperture in photography is that a smaller number on the aperture means a wider opening, letting in more light through the lens. For instance, an aperture of f/2.8 allows more light than f/16. So, if you increase the aperture number, you’re actually letting in less light.
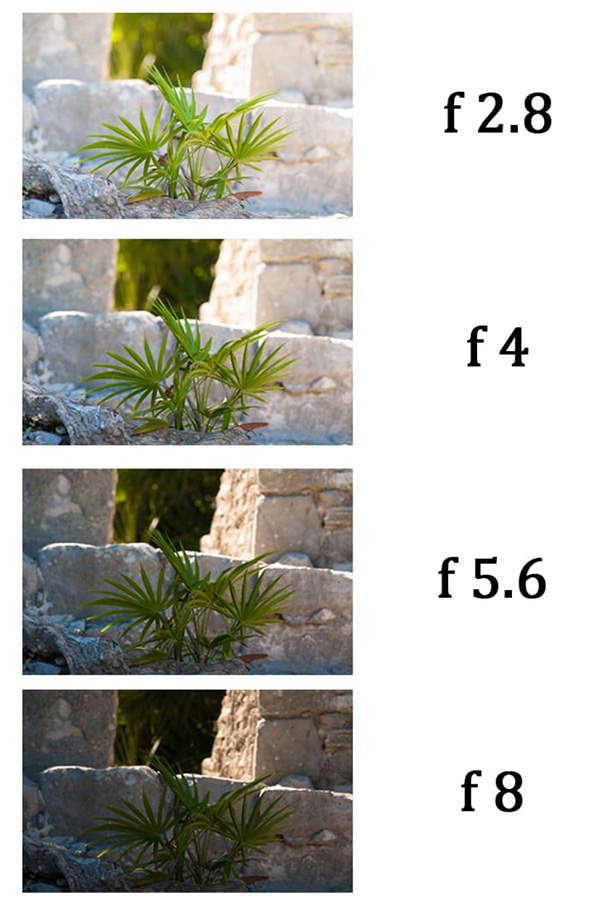
Let’s take a simple example where the shutter speed is set at 1/200 and the ISO is at 200. We’ll keep those settings constant while only changing the aperture value.
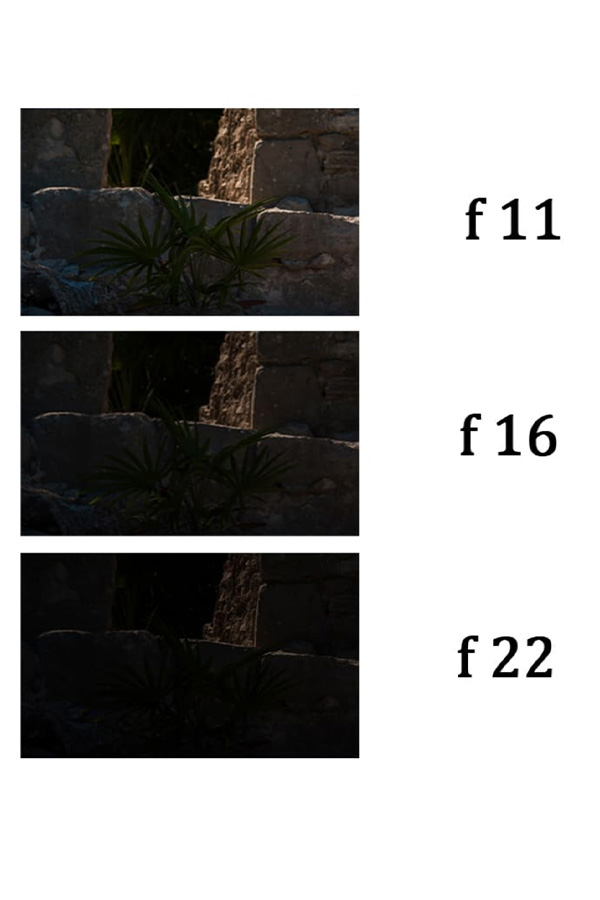
On all professional cameras, the aperture-priority shooting mode is marked with the letter A. In this mode, you choose the aperture value you want, and the camera automatically sets the appropriate shutter speed for you. It’s like telling the camera how wide you want the lens opening to be, and it takes care of adjusting the other settings to get the best exposure for your shot.
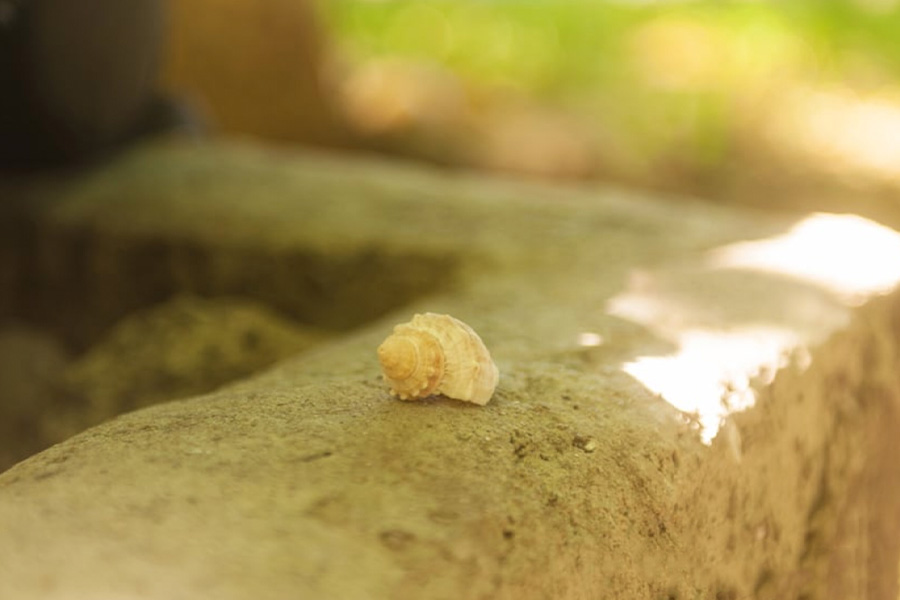
Depth of field (DOF) refers to how much of the scene is in focus, both in front of and behind the main subject. A large depth of field means most of the image will be sharp, while a small depth of field means only a specific part will be in focus, with the rest blurred.
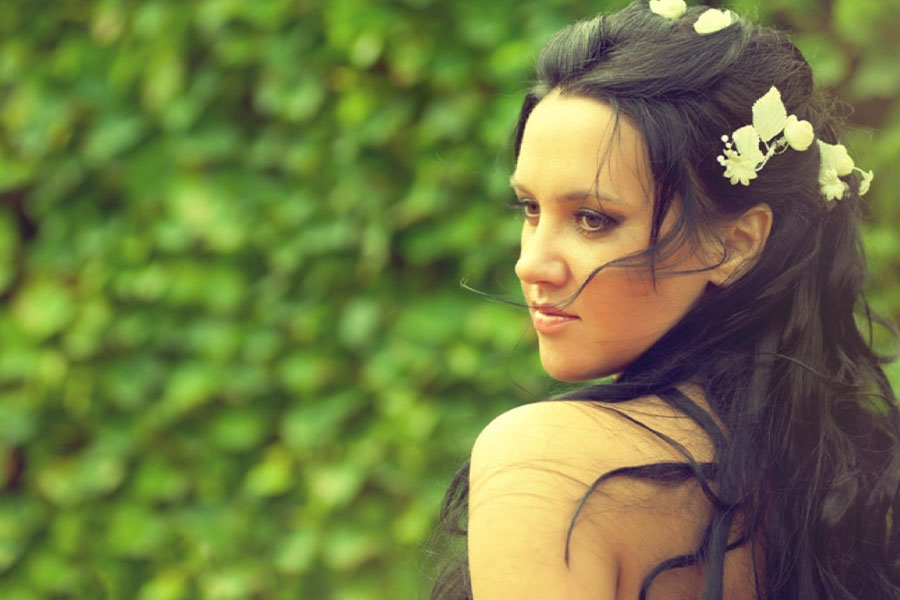
Let’s break it down with an example: An aperture value of f/2.8, which means the lens is wide open, results in a small depth of field. This is great for portraits because it blurs the background, drawing attention to the subject, especially their eyes, which are often considered the main point of a portrait.
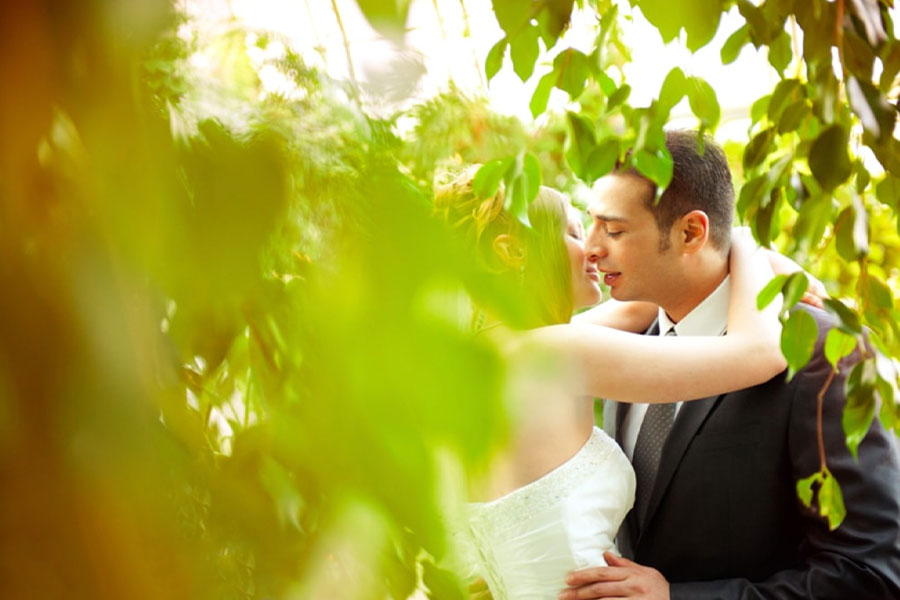
For instance, during a wedding photoshoot, I often used f/2.8 to capture stunning portraits with beautifully blurred backgrounds. However, using f/2.8 isn’t ideal for group photos because it can cause some faces to be blurry. In that case, it’s better to use a smaller aperture setting like f/8 or higher. This increases the depth of field, ensuring that more faces in the group are in sharp focus, even in different distances from the camera.
Exposure is basically how much light gets to the camera’s sensor during a shot. It’s made up of three main things:
When you take a picture, getting the right balance of these three things determines if your photo looks just right, too dark, or too bright.
Now, back to aperture in photography. Think of it as a window that lets light into the camera. The wider the aperture (and the lower the F number), the more light comes in, making the picture brighter. And vice versa, when the camera aperture is narrower (associated with higher F numbers), it’s like partially closing the window, restricting the amount of light entering the camera.
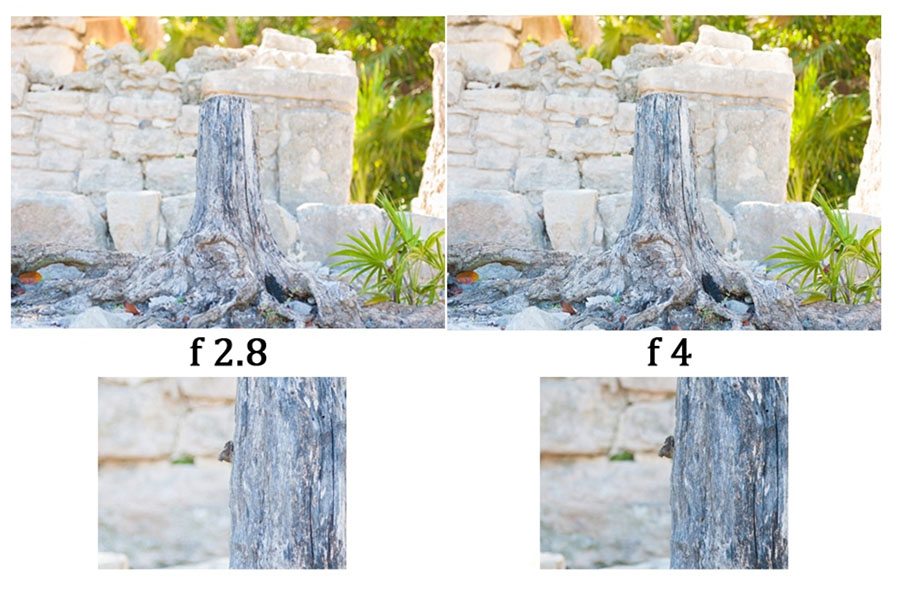
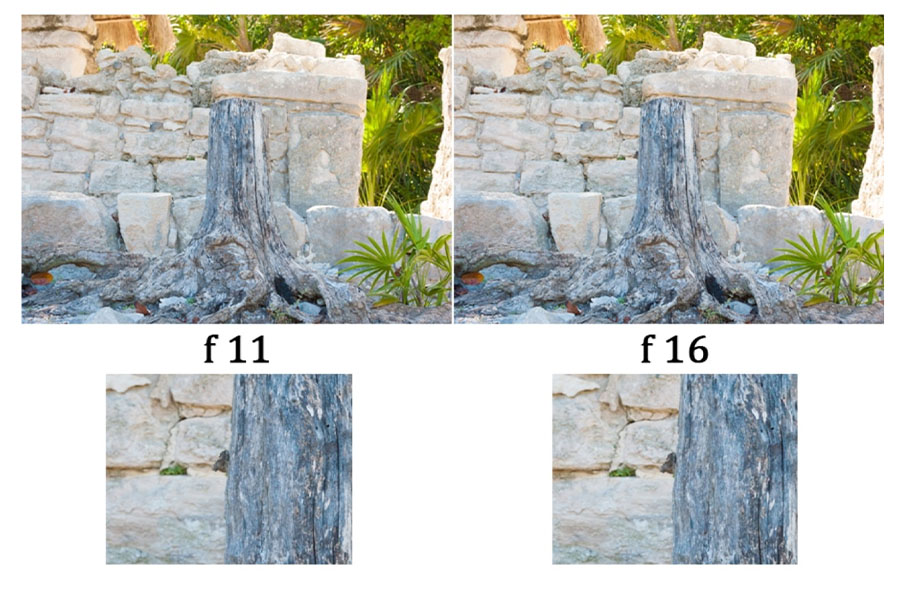
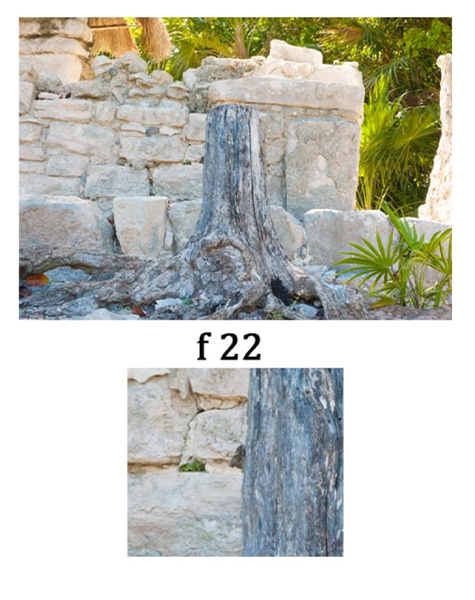
There aren’t hard and fast rules for this, but there are some guidelines to help you get the best results for different types of photography.
For architecture or landscapes pictures, photographers often use higher camera aperture values like f/16 or f/22. These settings give you a wider depth of field, so everything from foreground to background is sharp and detailed.
On the other hand, for portraits, lower aperture values like f/2.8, f/2, or f/1.8 are popular. This blurs the background, drawing focus to the subject and making sure no distracting details steal the attention from the model. For group portraits, go for camera apertures around f/8 or f/11 for everyone to be in sharp focus.
Always keep in mind, these are just initial suggestions. Don’t be afraid to try different camera apertures and see what fits your style and the situation you’re photographing. Practice is key, so keep at it, stay patient, and before you know it, you’ll be transforming your creative visions into breathtaking photos.
Stay inspired,
Elena Sullivan
Hi, there! I'm Elena Sullivan! The founder of the ArsVie photo studio, trilingual photographer, online educator, woman in business cheerleader. Capturing life's moments with authenticity and elegance to inspire others. Passionate about helping businesses convey their message through compelling imagery.
Copyright © 2024 ArsVie photo studio. All Rights Reserved.
We use cookies to improve your browsing experience, personalize content, provide social media features, and analyze our traffic. By clicking “Accept All Cookies,” you consent to our use of cookies. You can manage your preferences or find out more by visiting our Cookie Policy.